Happy 2009 everyone! : D
To kick start a good year ahead, I am going to share this calendar tutorial with you guys. So here goes:
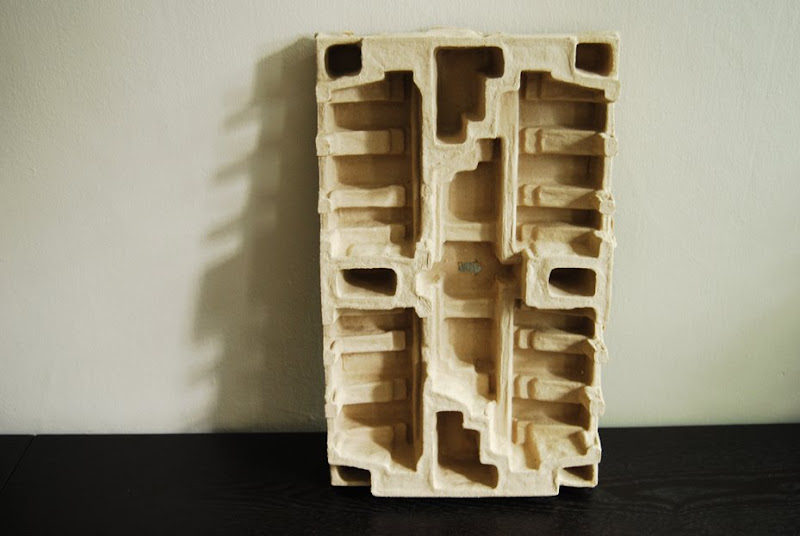
I am going to recycle a cardboard box that was used for an electrical appliance packaging. Fortunately, this open box has 12 compartments (for 12 months) which we will be needing. And the best thing is, this box has other lovely small compartments that I can decorate with. So, keep your 'trash'. They'll come in handy one day.

Once you've found your perfect box to work on, draw out a concept of how you want the calendar to look. The concept for this tutorial is nature. Hence I've decided to use recycled and green materials that conjure up the idea of 'nature'. I will also be creating a simple yet adorable rag doll with moss sprouting out of its ears. This character will give a touch of humour to the final piece. Give yourself a few days to think through if neccessary. Ideas don't usually come in a split second. Rather, they develop overtime.
After all the brainstorming, prepare your materials. We will be needing:
1. A cardboard box with 12 compartments
2. Some dried decorative hay or moss
3. Carpet grass
4. Sticks
5. Strings (Brown)
6. White clay
7. Fabric
8. Cotton wool
9. Felt wool square (Black)
10. Sewing Kit / Sewing Machine
11. Construction paper
12. White glue
13. Paper clips
14. Nuts and bolts / Nails
15. Penknife
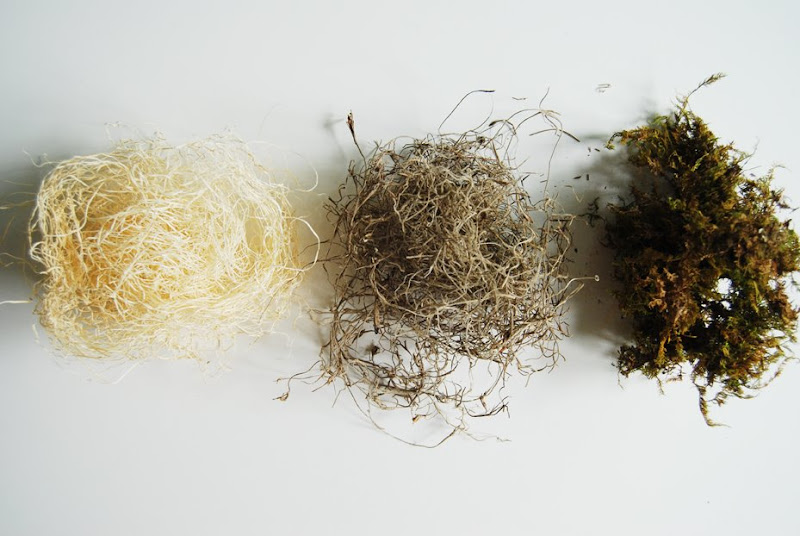
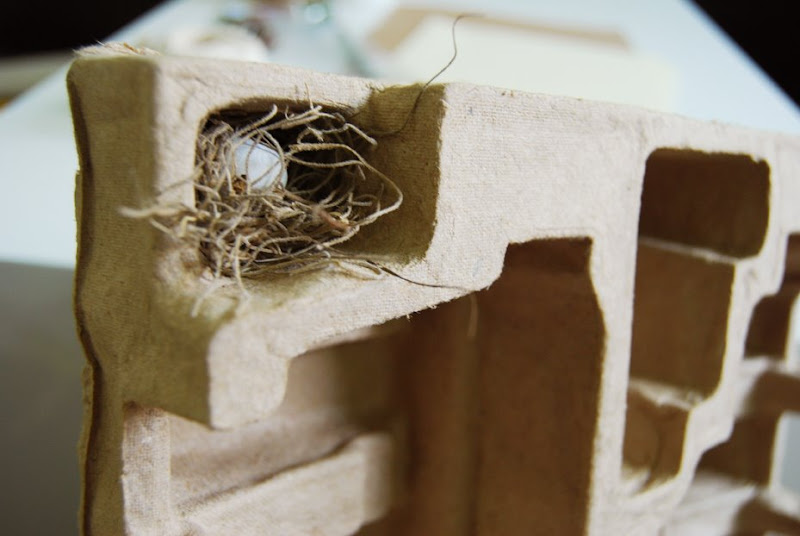
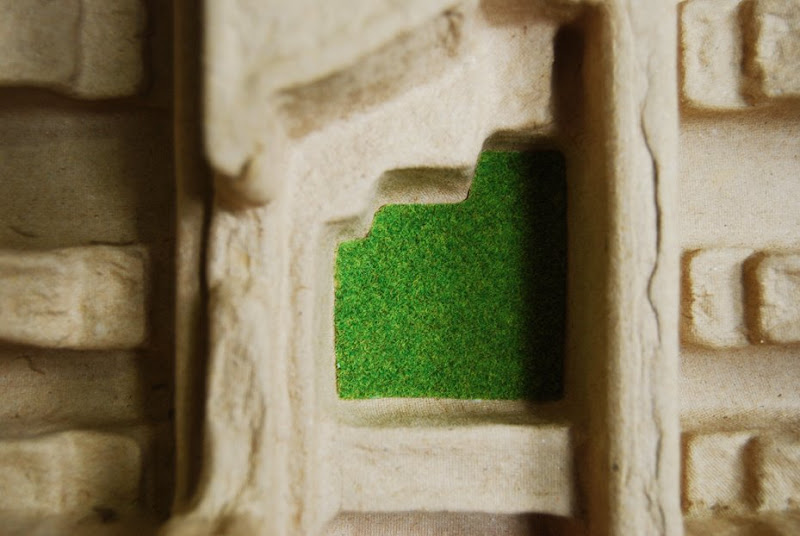
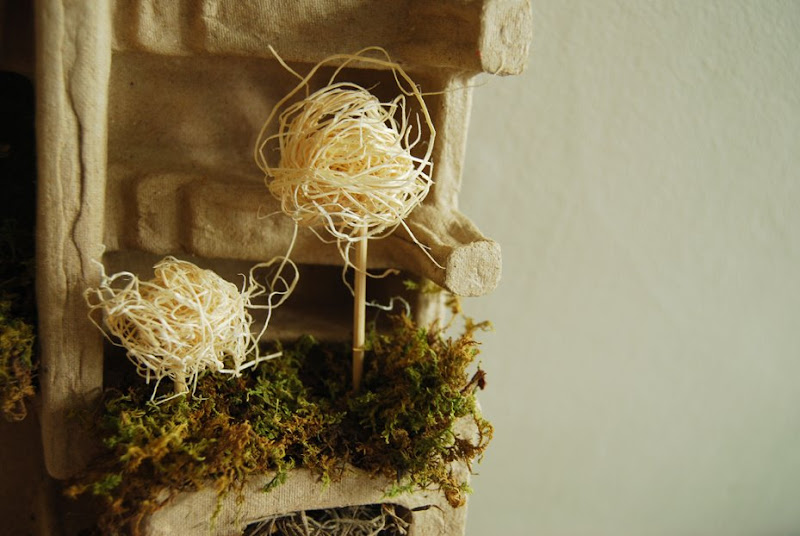
Stuff some decorative moss into the smaller compartments to create tiny bird nests. Roll the clay into small egg-shaped balls. Let dry then glue them into these nests. Next, cut out some carpet grass and stick onto the 'walls' of some compartments. If you're wondering how I managed to get the exact carpet size for this tricky shape, I actually reversed the box and traced out the irregular shape then used that as a template for the carpet grass.
Use your creative instincts to create a garden like landscape for along the rims or ledges of the box. I've glued lumps of moss on to make them look like grass platforms. Keep decorating until you are satisfied with the look of the grass-scape. Make some trees. Roll some hay into a ball and glue onto sticks. Let dry and glue the trees into the moss beds.
Here is how the box looks like at this stage:

Now for the calendar, grab any reliable 2009 calendar from the Internet etc. We will be needing the dates as reference. I am going to digitally create a new look for the calendar using Adobe Illustrator. Create a new A4 canvas. Divide it into 12 equal squares using the Ruler guide. Choose the fonts you want to use and copy the dates carefully from the reference material. You can highlight the important dates for that month and list them down on the footer.
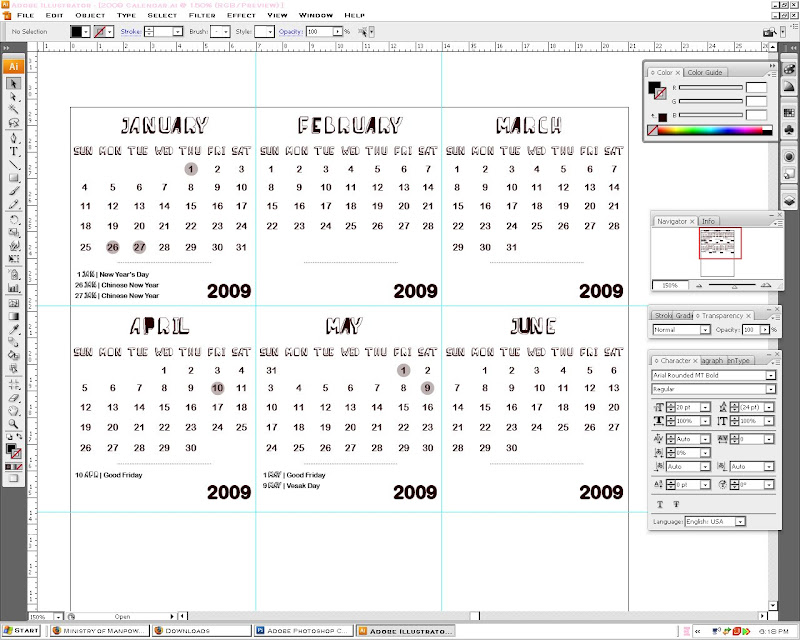
Be creative. Play around with the layout and design. Once you are satisfied with the look, double check again. You don't want any wrong dates that will eventually confuse you : ) Now print out your masterpiece onto a piece of A4 construction paper. I've used a brown paper that will fit nicely into my nature theme. Cut out the 12 months squares.

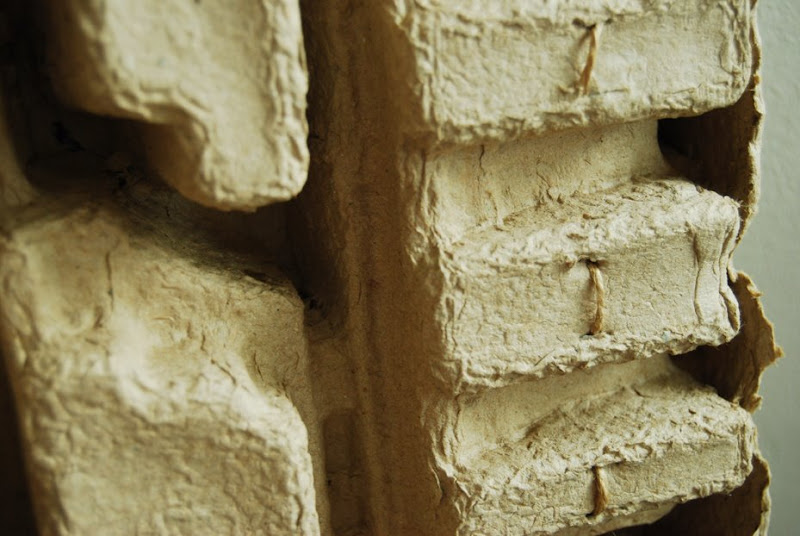
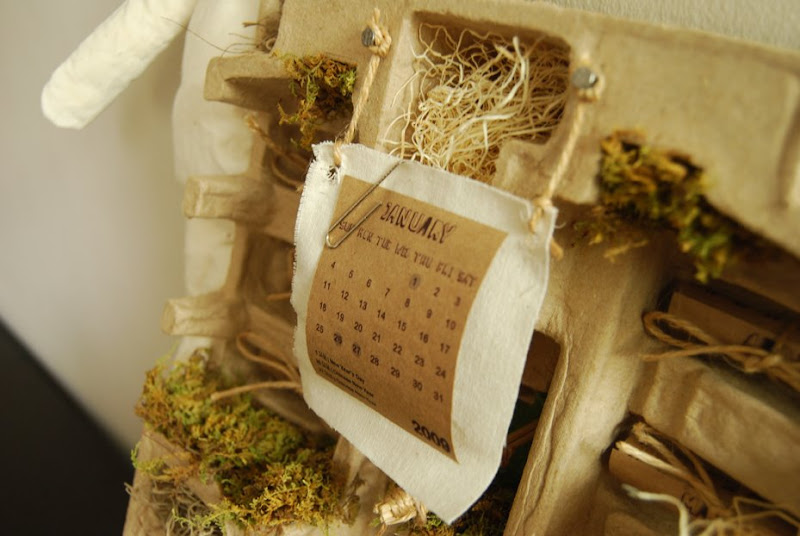
Here's the interesting part. We are now going to 'fix' these 12 squares into the 12 compartments of the box. Used a penknife to indent two slits in each compartment. Take a brown string, wring through these slits from the back. Next, roll the monthly calendar outwards so that the name of the month can be seen from the outside. Place into the compartment and tie it up with the brown string. Repeat for the other calendar months.

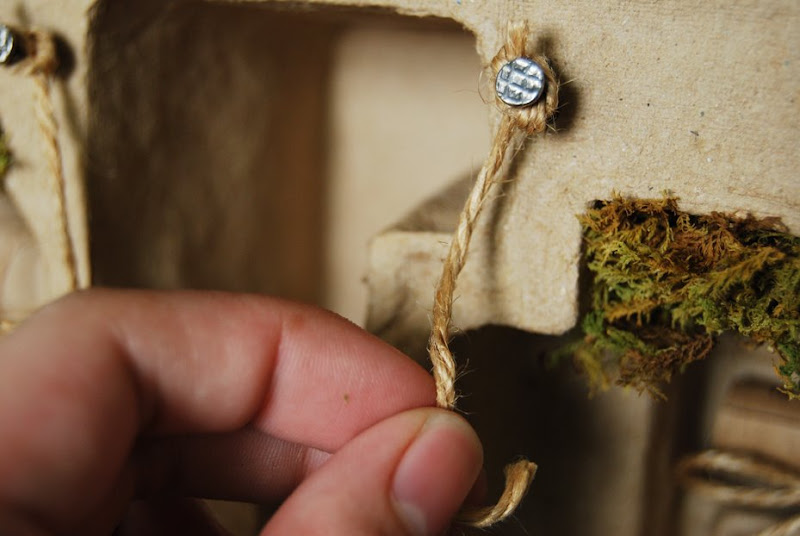
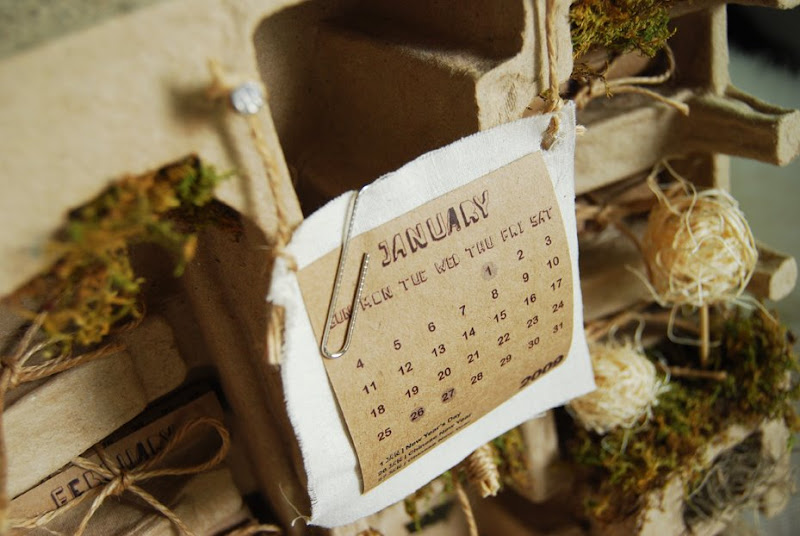
Leave the January calendar untied. We will be showcasing this month's calendar on a fabric billboard swing. For the billboard, cut two slits on the cardboard box and fix a nut and bolt or nail into each slit. Tie brown strings around both nails and let the strings dangle. Measure and cut out a 9.5 cm piece of square fabric. Punch or cut out two holes at the top corners. Tie the dangling brown strings through the holes on the fabric. Then clip the January calendar onto the billboard fabric using a paper clip. There you have it, a swinging billboard calendar showcase.

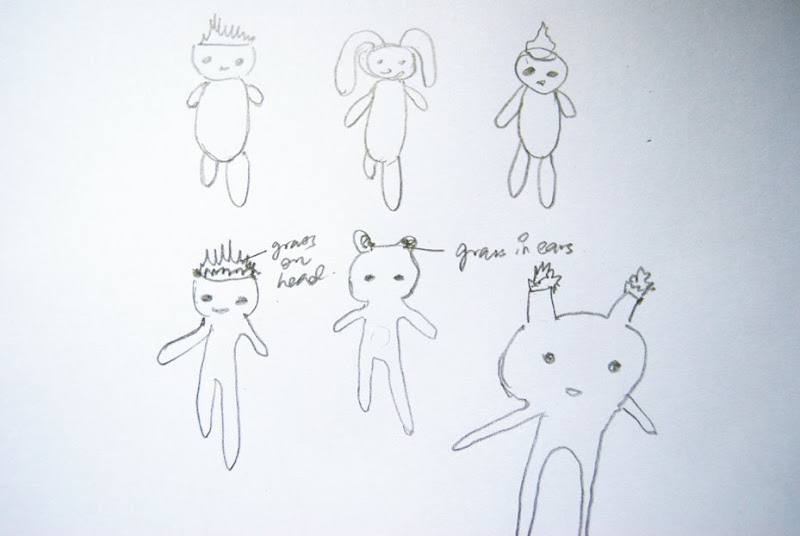
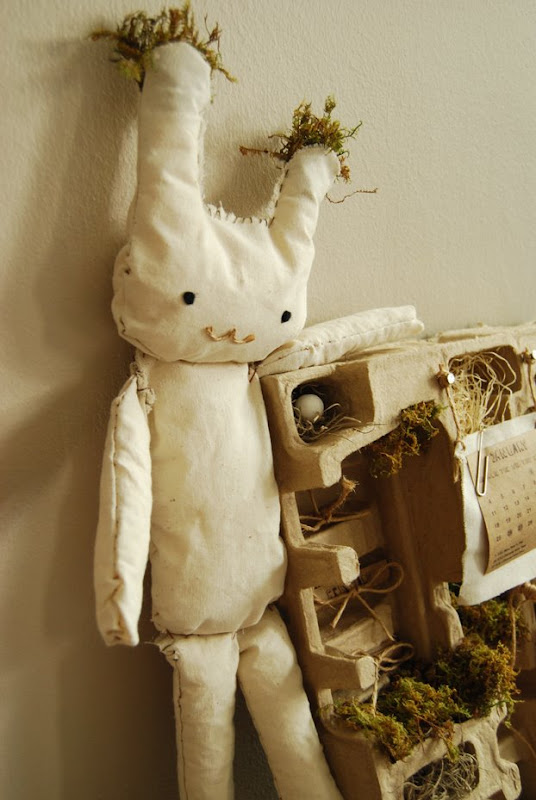
Now for the rag doll feature. Sketch out a few adorable characters. From my sketches, I've decided to go with the one that looks like a rabbit rag doll. Think about how you want the finish of the rag doll to look like. Do you want a clean finish to it or leave it ragged and raw. Your decision will determine how you will be sewing the doll. For this tutorial, I am following a rough look for the whole concept, so I will be sewing with my hands. I am going to rely on my imperfect stitching to create a ragged look for the doll.
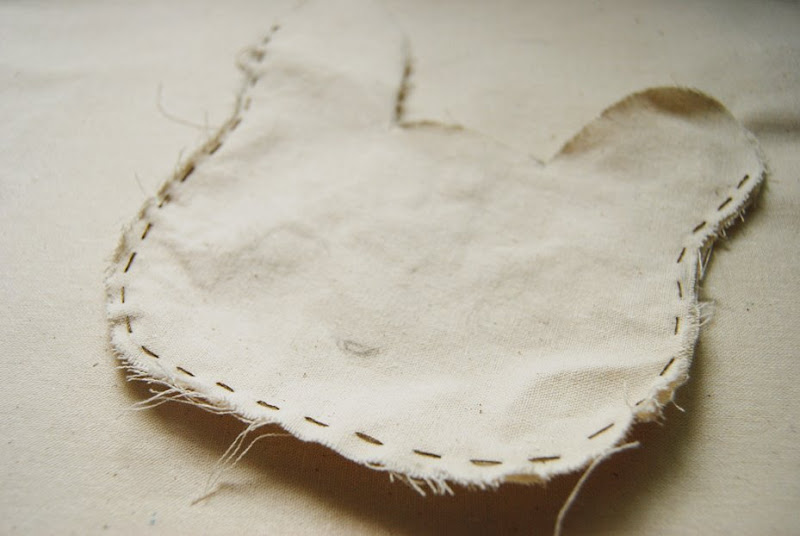
Firstly, fold the chosen fabric in two. Using freehand, draw out the head, body, hands and legs of the doll. Here's how you do the head of the doll in detail. Once you got the right shape, cut out the fabric and stitch it on the sides. Leave the top open. Once that's done, reverse the fabric inside out.
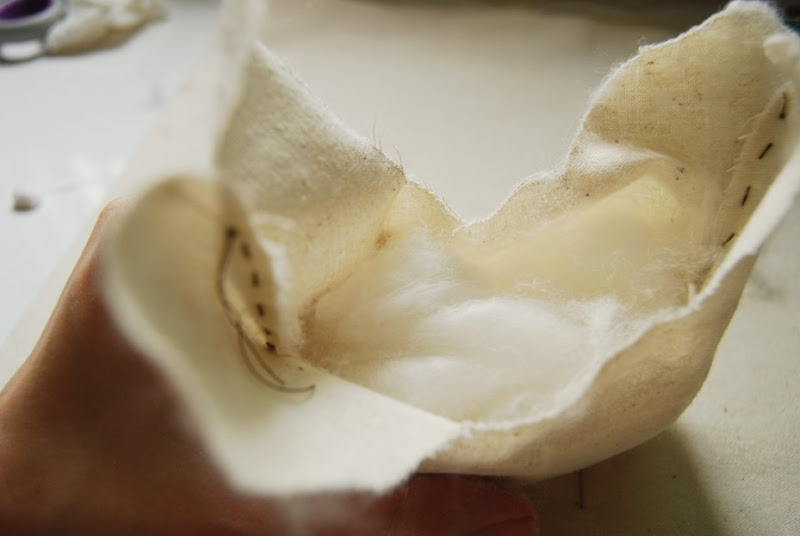
Fill in the cotton wool then stitch up the 'brain', leaving the ear holes open.
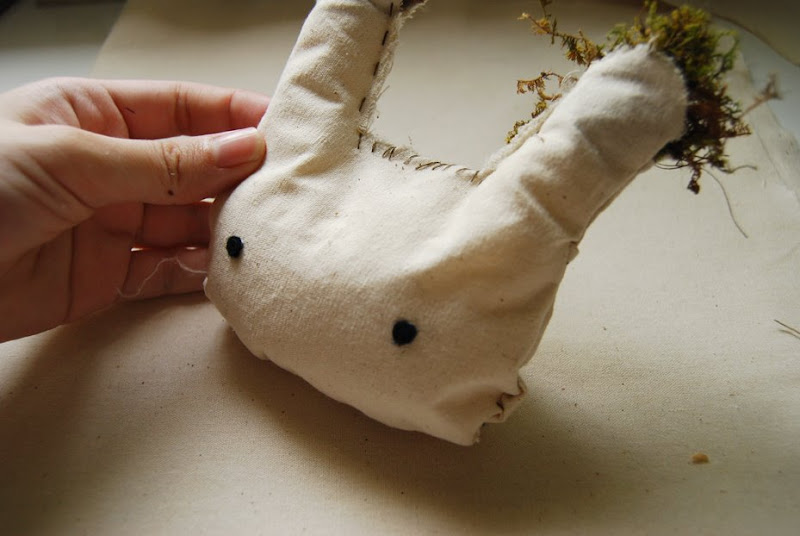
Stuff some decorative moss into the ears of the rabbit rag doll.

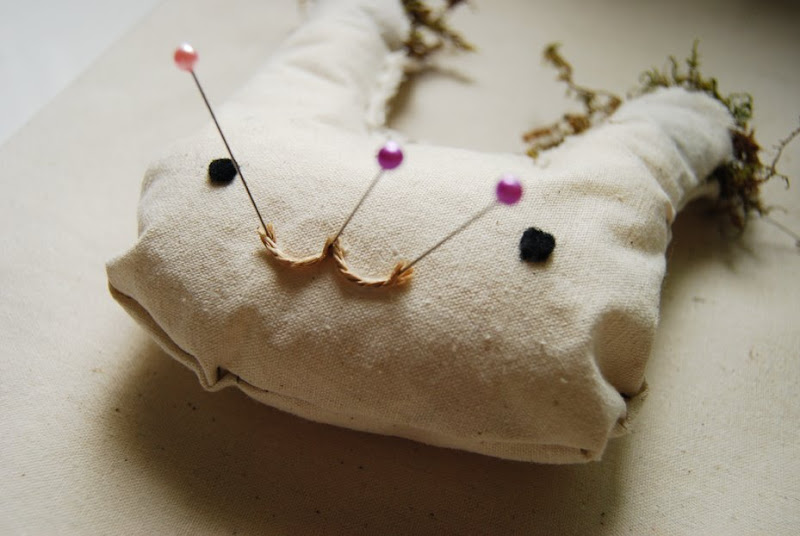
Use a hole puncher to punch out two small black eyes from the felt wool square. Stick the eyes on nicely. For the mouth, cut two short pieces of brown strings, curl it and stick on with glue. Use some bobby pins to hold these down while the glue dries.
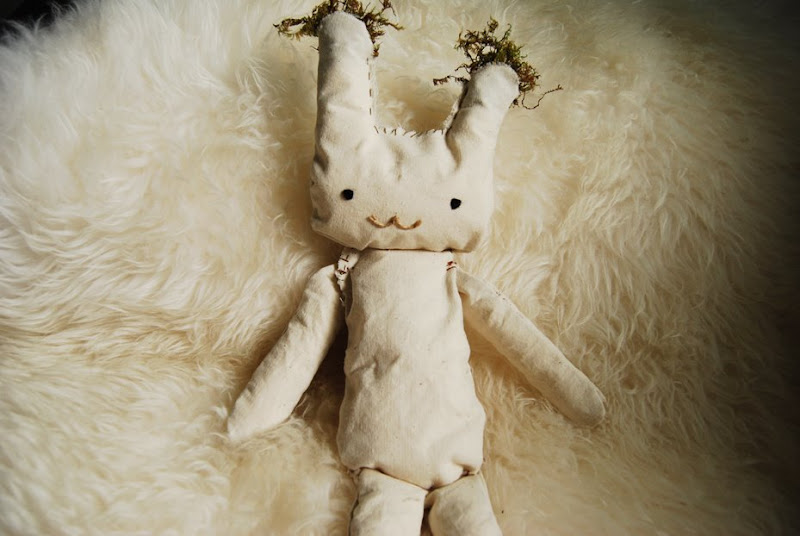
Repeat this process for the other parts of the body. Here's how my rag doll looks like:

Sitting comfortably.
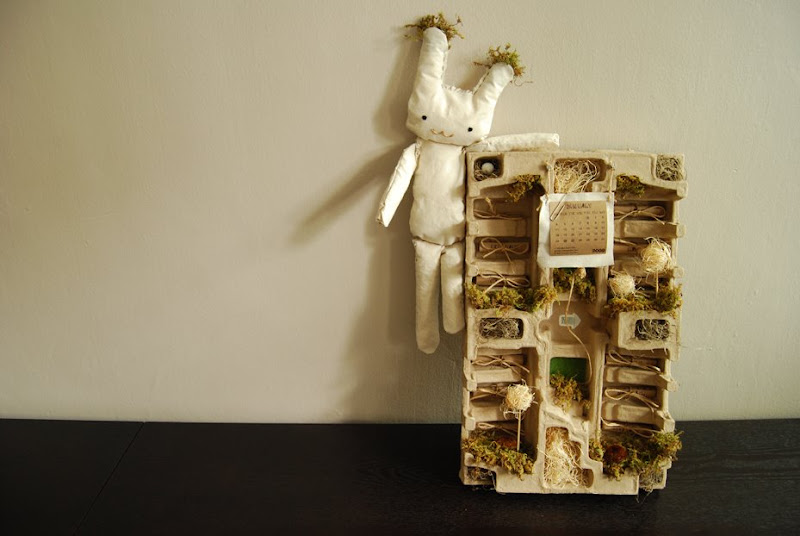
When the rag doll is finally done, pin it onto the frame of the cardboard box.
Tada! It's done! Phew!
Hang this up on your wall or leave it on a shelf. Enjoy : ) May the coming year ahead be a fruitful and meaningful one for everyone.
Cheers!
--Contributors--
Pearly


![[Technabob]](http://i97.photobucket.com/albums/l217/lOOling/technabob_small.jpg)